
Last Updated on February 8, 2023 by Catrina
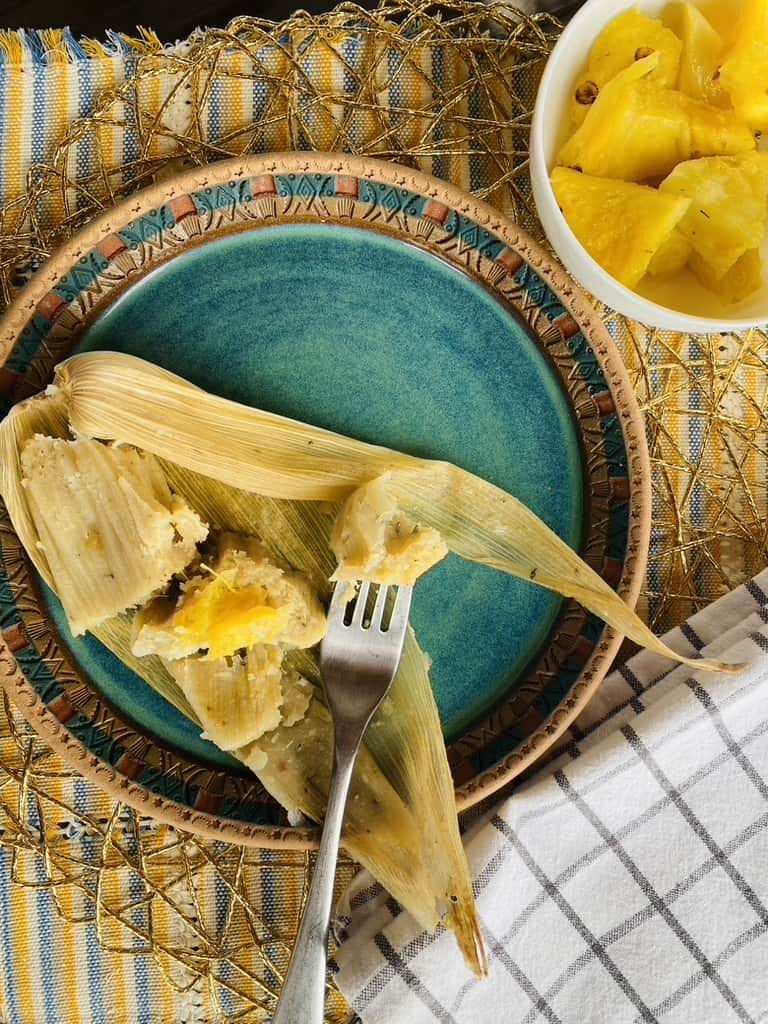
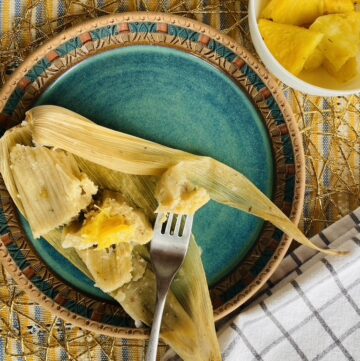
Tropical pineapple flavors star in this sweet, traditional Mexican tamal. Sweet pineapple tamales are simple to put together, fluffy, and moist. And with a slurry of blended pineapple added to the masa and additional pineapple chunks in the center, you are sure to taste pineapple in every bite!
Sweet tamal adventure
Last year, I worked diligently on savory tamales, like this tamales verdes with chicken recipe and a basic savory tamal dough recipe that you can use to fill with your favorite creations.
This time around, I am on a mission to learn and master the art of making sweet tamales. Since I am a chocolate addict, I naturally started experimenting with a chocolate tamal recipe. And while chocolate has a special place in my heart, I realize that it is not everyone’s favorite.
So, I decided to try my hand at a more traditional sweet tamal recipe, tamal de piña, or pineapple tamal.
Luckily for me, Señora Lore, offered to teach me how to make sweet pineapple tamales. Here, I document her process and share her method with you!
Tips for making pineapple tamales
The tips for making these tamales are very similar to the tips I share in my chocolate tamal recipe. But just in case you haven’t looked at that recipe, I am going to list the tips here as well.
Soak extra husks
This recipe will yield about 20 5-inch tamales, the perfect individual dessert size in my opinion. BUT, you will want to soak more than 20 husks for the following reasons:
- I give an approximate amount of filling for these tamales. If you use more or less filling, your yield will be different. Having extra husks on hand means you don’t have to soak extra husks in the middle of your assembly process if your tamales are a bit on the smaller side.
- Not all corn husks are created equally. My corn husks come in a variety of sizes. Sometimes I need to overlap two husks to create a big enough packet for my dough. Or sometimes my husks come with little tears or holes that I need to patch. Having extra husks soaked makes it easy to switch out any holey husks or use smaller husks to patch any rips or tears.
- I have gotten into the habit of lining the top of my steamer basket with corn husks and then placing another layer of corn husks on top of my tamales as they cook. This helps keep the water in the pot from evaporating as quickly. Having extra soaked corn husks on hand ensures that I have enough to make my tamales and line my tamalera!

Slightly oversweeten the dough
If you have made savory tamales, like my tamales verdes with chicken, you will know that I oversalt my masa prior to cooking. Salt tends to evaporate out of the tamales as they cook. So a dough that is perfectly salted prior to cooking will lead to an undersalted final tamal. For sweet tamales, the same holds true but for the sugar.
You will want to have your dough just slightly on the sweet side prior to cooking so that the final tamal is sweet and not bland.
Trust me. I tested this. My first batch was perfectly sweetened prior to cooking and the final product wasn’t sweet enough for my taste. Here, I recommend 1 1/4 cups of regular granulated sugar for every 2 pounds of masa.
I highly recommend you add the sugar to the masa at about 1/4 cup at a time and taste the masa as you go. If your pineapple is sweeter to start with, you may need less sugar. And the opposite would be true if your pineapple is a bit underripe.
Fresh pineapple vs. canned
I am lucky enough to live in a semi-tropical climate where fresh pineapple is available year-round. But, I realize that is likely not the case for most folks.
So, I made it a point to test this recipe with both fresh and canned pineapple.
The biggest difference that I noticed between canned and fresh pineapple was the texture and color of the pineapple. The canned pineapple had a softer texture and lighter color than the fresh pineapple. And while I thought that I might need less sugar with the canned pineapple (especially since I was using the kind in syrup), I ended up using the same 1 1/4 cup sugar for both the fresh and canned pineapple batches.
Use whatever you have available or whatever color or texture you prefer!
Use masa ground for tamales
I like to make these pineapple tamales with fresh masa ground specifically for tamales. Tamal masa is less finely ground than tortilla masa, which makes these tamales a bit more fluffy and light in texture. Tortilla masa typically produces a more compact tamal, like in this recipe for black bean tamales.
Where to get masa for tamales
To get my tamal masa, I call up my favorite tortilla supplier a day before and ask her to have tamal masa ready for me the next day. It is freshly ground and works perfectly for these tamales!
In the US, I have found fresh masa for tamales in Latino supermarkets.
And another note…you will want to check the ingredient label prior to buying any masa. Some masa is sold preparado (prepared), which means it may already include salt, lard, and water. The masa I use is simply corn that has been through the nixtamalization process (my article on basic tamal dough explains what nixtamalization is). There are no other ingredients in the masa.
Alright! Now that we have the tips and tricks out of the way, let’s get to cooking!
How to make pineapple tamales
Making the masa
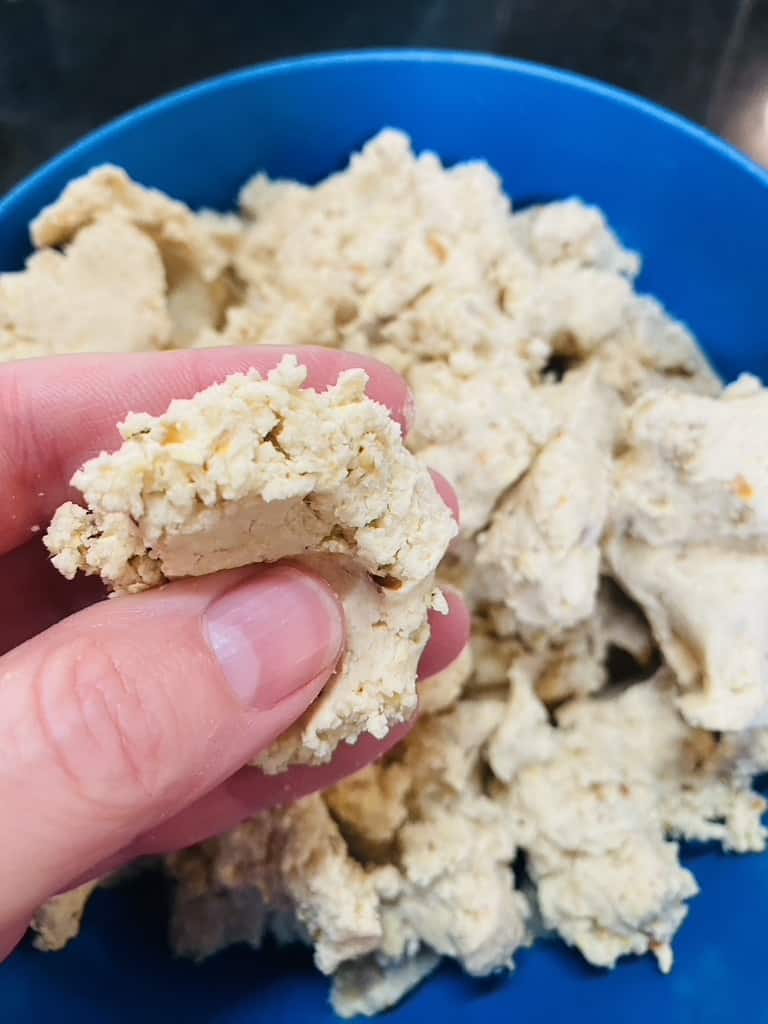
Prepared masa for tamales should be light and fluffy. If the masa hasn’t been mixed thoroughly, the cooked masa will be denser and more compact.
Señora Lore mixes her pineapple tamal masa by hand. I like to enlist the help of my trusty stand mixer, fitted with a paddle attachment.
Put the lard in the mixer bowl, and beat for 10-15 minutes on medium speed or until the lard has lightened in texture and color.

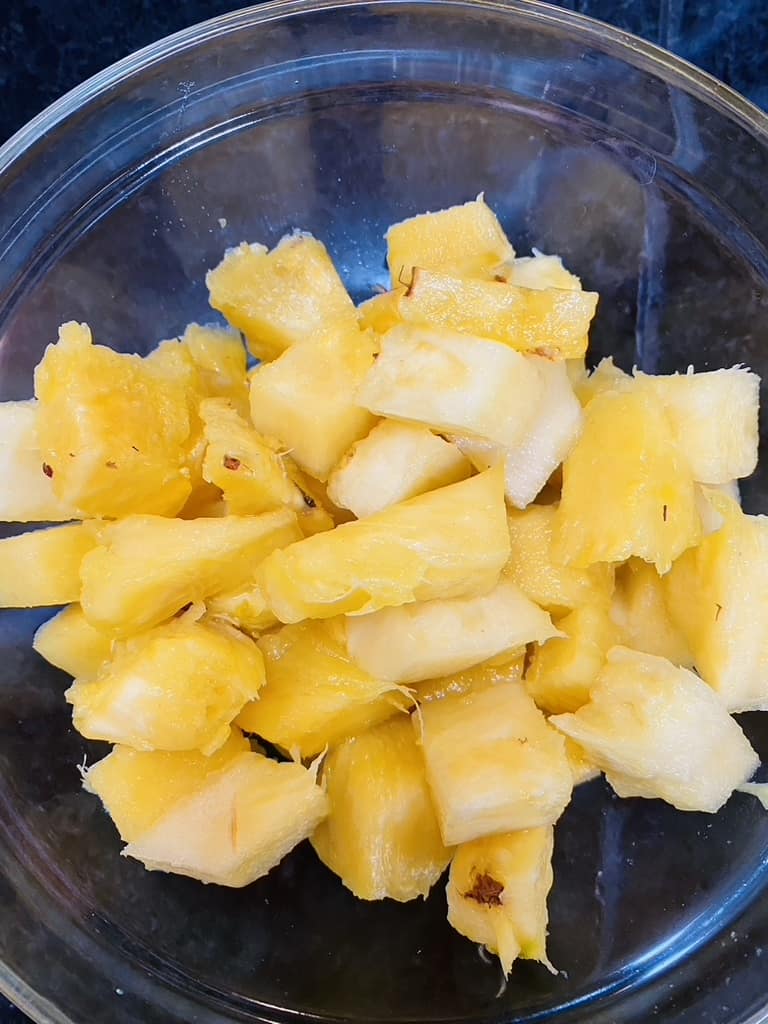
While you are mixing the lard, make the pineapple slurry that you will add to the masa to boost the pineapple flavor. Put ~3 cups of pineapple chunks in the blender with about 1/4 cup liquid (water, pineapple juice, or syrup if using canned). Blend on high until the mixture is smooth.
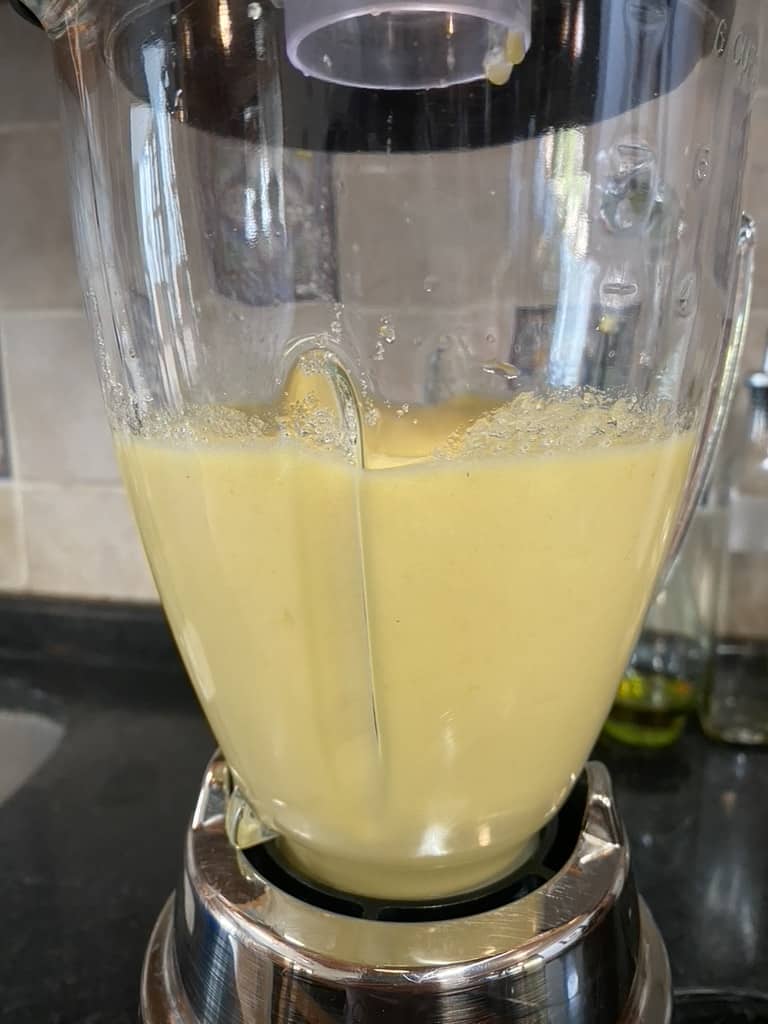
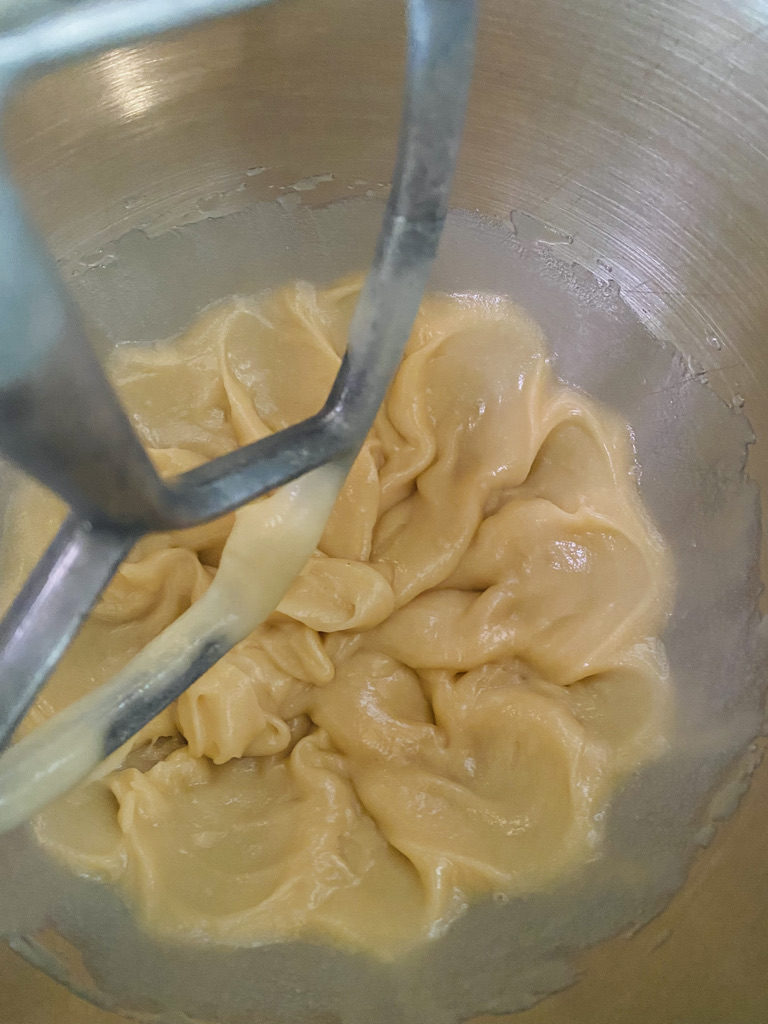
Now, you are ready to make your dough! With the mixer still running, gradually add the masa alternating with the pineapple slurry and sugar. Continue mixing for another 5 minutes or until all of the ingredients are incorporated.
I highly recommend adding the sugar about 1/4 cup at a time and tasting the dough after each addition. My dough has been consistently sweetened with 1 1/4 cups of sugar. But you may need more or less sugar. Your dough should be just slightly sweeter than you want your tamales to be.
The consistency of this mixed dough should have the texture of a runny cake batter.
Filling the corn husks
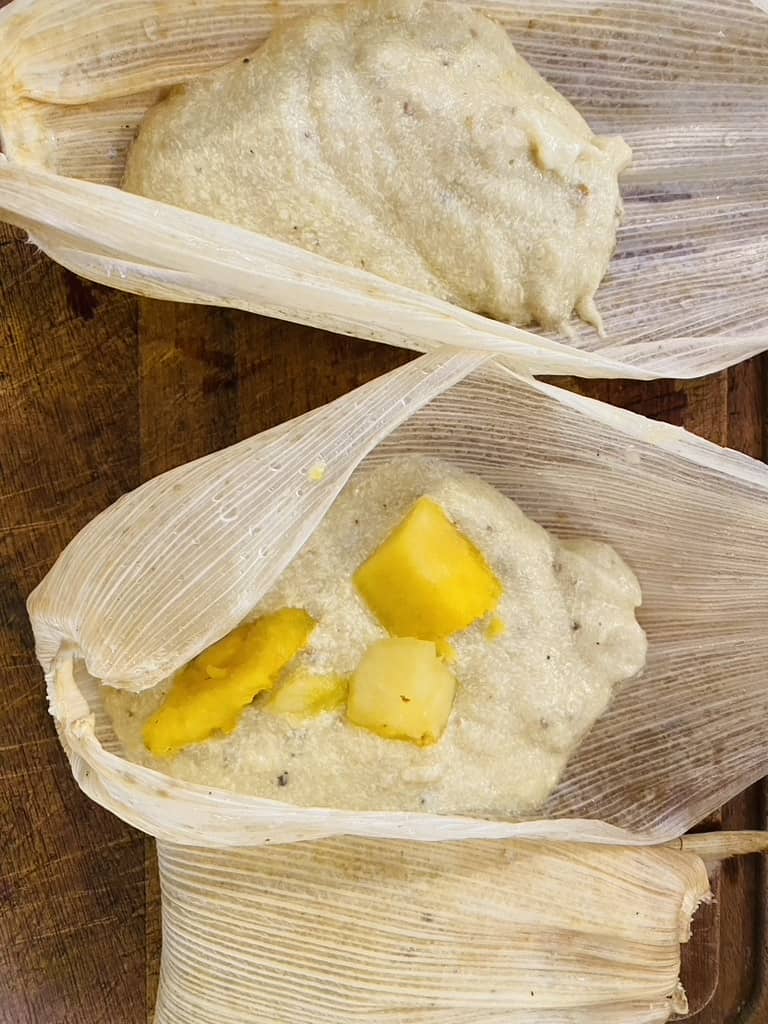
Once your masa is properly mixed, you are ready to fill the corn husks! Spoon a bit of the masa mixture into the corn husk towards the curved bottom part of the husk. Notice that there is a space between the bottom of the corn husk and where the masa mixture starts. You don’t want to place the masa too close to the edges of the husk, otherwise, it will be hard to fold the packet and the mixture could leak out. If you have any tears in the corn husks, use an extra piece of corn husk to patch the tear.
Next, spread the filling upwards slightly towards the pointed end of the corn husk. Add 2-3 pineapple chunks to the center of the tamal. Now you are ready to fold!
Folding the tamal
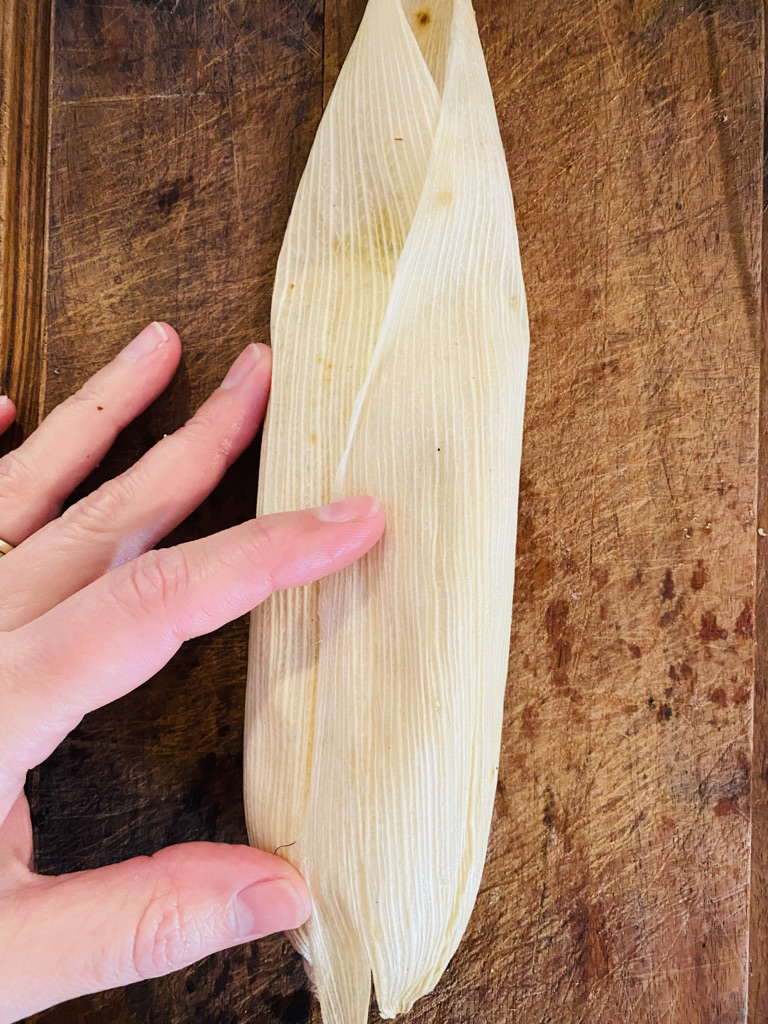
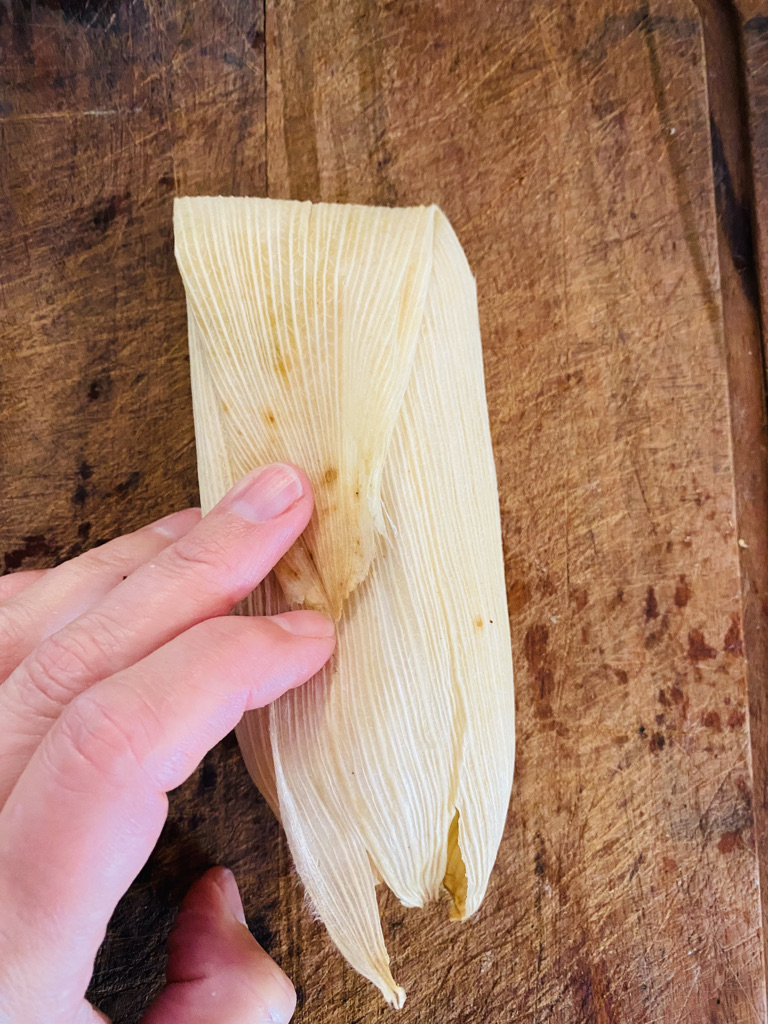
Folding a tamal is easy, once you get the hang of it! With the filling inside the corn husk, fold so the sides overlap the filling and the pointed part of the husk closes downwards. It’s that simple! Because this batter is a bit runnier, I like to stand these wrapped tamales on the folded end in a bowl or other container, to keep the filling from leaking out while I fill all of my husks.
Once all of the husks are filled, get a large pot ready for steaming.
Cooking pineapple tamales
To steam my pineapple tamales, I use a tamalera, a pot specifically designed for making tamales. If you don’t have a tamalera, don’t worry. These can steam in any tall pot with a steamer basket. The below picture shows how you can set up a regular stock pot with a steamer basket to cook your tamales.
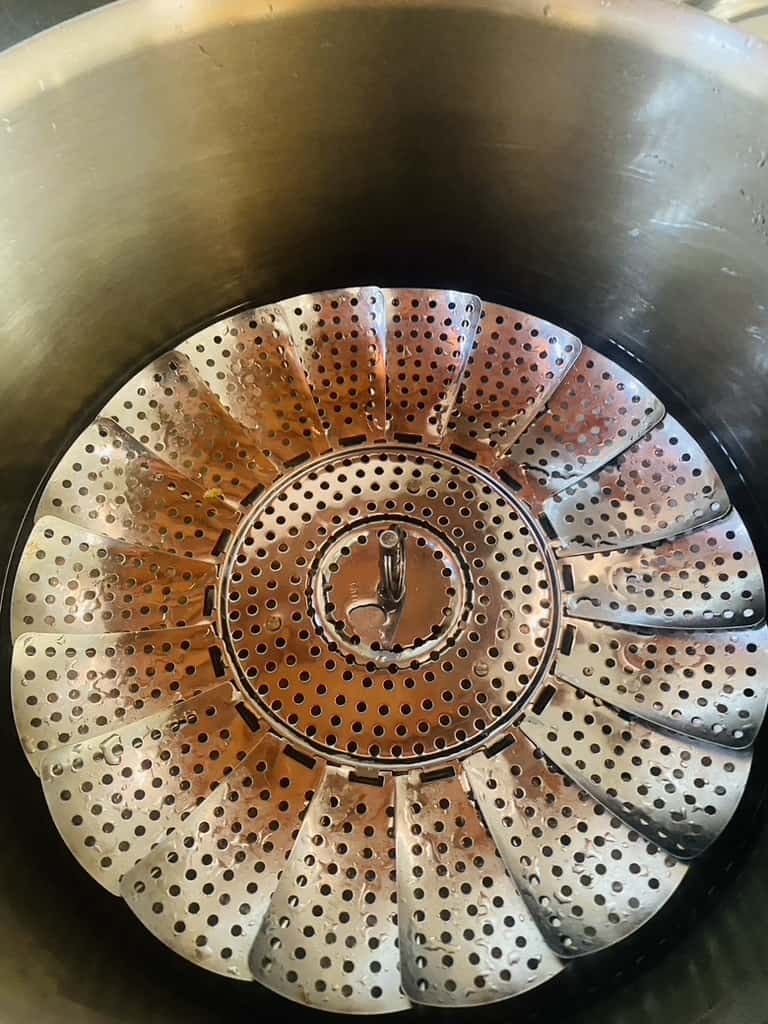
Fill your pot with a generous amount of water, but make sure that the water level does not come above the steamer basket. You don’t want the tamales to get wet during the cooking process. Heat covered over high to a boil and then reduce the heat to maintain a simmer. Place the tamales standing up with the folded end of the husk towards the bottom of the pot.
I have noticed that if the tamales are too squished together in the pot, they don’t cook as evenly. Or I sometimes have a tamal explosion (where some of the filling blows open the folded husk). If you are making a large batch of these, I would recommend placing corn husks on top of the bottom layer of tamales in your pot, and then stacking a second layer on top.
Placing a layer of corn husks on top of the steamer basket (under the tamales) and another layer on top of the tamales helps to keep the steam inside the pot and the water from evaporating too quickly. The picture below shows how my tamales look in my pot with the corn husk layers.


Once you have the tamales in the pot, cover them with a lid and steam them until they are done!
How to know if your tamales are done
It is important to know how to check if your pineapple tamales are done since each cooking setup and temperature is a little bit different.
I start timing the tamales from the point when the tamales are in the pot and the water is simmering. It usually takes me about 1 1/2 hours to have these cooked the whole way through. But I like to start checking the tamales to see if they are done after 1 hour.
To check for doneness, pull a tamal out of the pot using kitchen tongs. Open up the tamal packet and gently roll the tamal back and forth in the corn husk. If the tamal pulls easily away from the corn husk, they are done! If the masa is still sticking to the husk, simply rewrap the tamal, place it back in the pot, cover and let them cook for a bit longer. I like to check about every 15-20 minutes after the first hour to see how things are coming along.
These tamales will feel soft to the touch, even when they are fully cooked. They will firm up a bit as they rest, so I like to wait 10-15 minutes before serving these…if you can resist the temptation to eat them straight from the pot 🙂

I hope you enjoy these pineapple tamales as much as we do! Happy cooking!
If you are interested in other tamal recipes, try these other favorites!
Source: Lorenza Lafragua, Cuernavaca Morelos
Sweet Pineapple Tamales
Ingredients
- 3/4 cup lard
- 25-30 dried corn husks see notes
- ~5 cups pineapple chunks divided, fresh or canned see notes
- 1/4 cup water, pineapple juice, or syrup if using canned pineapple
- 2 lbs masa for tamales
- 1 1/4 cup sugar see notes
Instructions
Prepare the ingredients
- In a standing mixer with a paddle attachment, beat lard on medium speed until lightened in color and texture, about 10-15 minutes.3/4 cup lard
- Meanwhile, fill a large bin or sink with water. Soak dried corn husks for about 15 minutes or until pliable. Remove from water and shake any excess water off prior to assembling. See notes.
- Blend 3 cups of the pineapple with water (or juice or syrup) until smooth (yield ~3 cups of pineapple slurry). Reserve remaining pineapple for assembly.~5 cups pineapple chunks divided, fresh or canned, 1/4 cup water, pineapple juice, or syrup if using canned pineapple
- With the mixer still running, gradually add in the masa, alternating with the pineapple slurry mixture. Add in the sugar about 1/4 cup at a time, tasting for sweetness in between each addition. Turn off after about 5 minutes, or when all of the ingredients are evenly incorporated and the mixture has the texture of a runny cake batter.2 lbs masa for tamales, 1 1/4 cup sugar
Assembly
- Fill the tamal pot (tamalera) or a pot fitted with a steamer basket with water to just below the steamer basket level and heat on high to a boil. Reduce heat to medium and continue simmering. See notes.
- Using a spoon, place ~1/4 cup masa mixture into the curved part of the corn husk and extend 1/2 to 2/3 of the way upwards towards the pointed ends of the husks. You will want to leave about 1/2-1 inch gap between the bottom and sides of the corn husk and the masa mixture.25-30 dried corn husks
- Place 2-3 pieces of pineapple chunks in the middle of the masa.~5 cups pineapple chunks divided, fresh or canned
- Fold the sides of the husk over to cover the filling completely and fold the pointed end of the husks downwards towards the curved part of the husk to create a packet. See photos for reference.
- Repeat previous 3 steps until all of the masa is gone
- Line the top of the steamer basket with left over corn husks. Place the tamales standing upright with the folded end of the tamal towards the bottom of the pot in the steamer basket.
- Cover the tamales with additional corn husks, cover the pot with a lid and allow the tamales to steam for 1-1.5 hours, or until the masa is cooked through. See notes
- Let rest 10-15 minutes prior to serving to allow the tamal to firm up. To eat, remove from the pot with tongs and carefully remove the corn husks. Enjoy!
Notes
-
Dried corn husks are usually sold in packages in the Hispanic food aisle of the grocery store. For this recipe, you will need 25-30 large husks. I typically soak additional husks in case any of the husks have tears. You can then use smaller pieces placed on the inside or outside of the tamal to cover any tears and ensure that the masa mixture is completely covered. Use the leftover husks to line the top of the steamer basket and to place on top of the tamales in the pot. Any extra husks can be dried and stored for future use.
-
If you have extra stubborn husks that don’t want to soften, try soaking them in warm water. Mine usually soften up just fine with water straight from the tap, but I have read comments from other readers that warm water works better for them.
- I have used both canned and fresh pineapple for this recipe. The fresh pineapple chunks tend to be a bit firmer than the canned variety. So if the firmness of the fruit is important to you, choose canned or fresh pineapple based on what you prefer.
-
I use a masa ground for tamales for this recipe. It is not salted and it does not have lard added in. I have seen this type of masa available in Latino food markets in the US. Check the ingredients on any masa for tamales that you purchase so that you know exactly what is in it. If you are starting with cornflour like Maseca, you will need to add water to prepare the masa according to the package directions prior to using this recipe. I have not tested this recipe using Maseca.
-
You will want to slightly over-sweeten the masa since some of the sugar will evaporate during the cooking process. In my experience, a masa that is perfectly sweetened prior to cooking will yield a slightly bland cooked tamal. I use 1 1/4 cups of sugar in this recipe and this is the perfect amount for me. I recommend, however, that you add the sugar gradually, 1/4 cup at a time, and taste the masa after each addition. This will allow you to adjust the sweetness to your preferences. I have used both canned pineapple slices in syrup and fresh pineapple for this recipe and each time 1 1/4 cups of sugar produced a sweet (but not overly sweet) tamal.
-
You may need to add water to your pot during the cooking process, depending on how much water your pot can hold below the rack or steamer basket and how quickly that quantity evaporates. If you need to add water, pour water down the side of the pot to avoid getting the tamales too wet. A trick to know when you are low on water is to place a coin in the bottom of the pot. When the coin starts rattling, you know you are low on water.
-
These tamales usually take me around 1.5 hours to cook through. I count the cooking time from the point when the tamales are in the pot and the water boils. You can add the tamales to the pot prior to the water boiling.
-
I start checking these tamales for doneness at about 1 hour. To check for doneness, remove a tamal from the pot and gently peel back the husk. Gently roll the masa back and forth in the husk. If the masa peels away easily, then the tamal is done. If the tamal is not done, re-wrap in the corn husk and place it back in the pot. The texture of this tamal will be moist, but still fluffy. Tamales will also firm up a bit once they cool, so I recommend letting these rest for about 10 minutes prior to serving.
-
I reheat these by steaming them on the stove. From the fridge, it should take 7-10 minutes to reheat all the way through or 30-35 minutes from frozen. Open and check them to make sure that they are heated all of the way through prior to consuming.
Leave a Reply